96% of teachers who have flipped recommend it to colleagues*
Educators who have flipped their classroom have reported increased engagement and participation from their students, have seen better quality work and improved grades, and have received better instructor satisfaction.
*Online study conducted by Flipped Learning Network and Sophia
What is a flipped classroom?
A flipped classroom utilizes video lessons which students watch at home as many times as needed so that class time is better spent interactively with the teacher and in small groups, problem solving and exploring content further.
Should I make my own video lessons?
There are several existing instructional videos covering an array of subjects on sites such as YouTube, TeacherTube, Khan Academy, and LearnZillion, to name a few. But it can be time-consuming and difficult to find one that works for your specific needs.
Plus, students are much more receptive to videos made by their own teacher. And while making your own screencast may seem daunting at first – it can be easier than you think.
To help you get started, we’ve put together an easy-to-follow, five-step guide to making video lessons.
How to make your own videos in five easy steps
1.
Download a free, fully-featured trial of FlashBack Pro.
Create a script or outline of what you want to say alongside any presentation or application you’ll use.
TIP: Keep it short. Studies have shown that the optimal video length is around six minutes or shorter. Once videos start to run longer, students become less engaged. So if you’re covering a lengthy topic, try breaking it up into bite-sized chunks.
3.
Clear your desktop of any distracting items and open up any programs you need for your lesson. Do a few practice runs and keep your notes handy. Remember you can always pause during recording.
TIP: Some users find it easier to annotate as they go along. A nifty little tool which lets you annotate free hand using your mouse is ScreenMarker.
4.
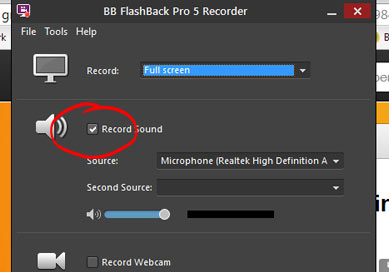
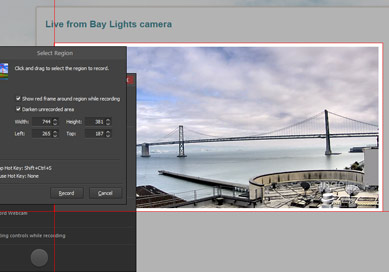
Open up FlashBack. To record your voice, make sure the ‘Record Sound’ box is ticked and choose the microphone option from the drop down window. You can choose to record your full screen or click and drag to define an area to record. Press the red button to start. To stop recording, press Shift+Ctrl+S.
Tick the microphone option to record your voice.
Define the area of that you want to record.
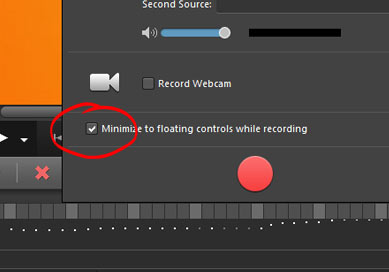
TIP: If you want the pause button to be handy during recording, go to ‘Tools’ and click on ‘Minimize to Floating Controls’.
5.
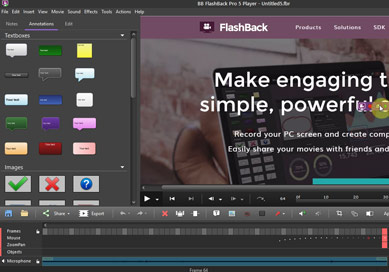
When your recording is complete, you can play it back and edit or enhance it if you want. If you’re happy with the finished results, you can share immediately or export your video to any of the following formats: MP4, Flash, QuickTime, AVI, GIF, and Windows Media Video. If you plan to share your video on YouTube, we recommend MP4.
Do more with FlashBack
You can personalize your video further with a picture-in-picture webcam of yourself.
Need to delete some ‘umms’ in your screencast? Want to zoom in and out? Ready to add a few extras like highlighting text or an area, or want to add textboxes or interactive buttons?
To learn how to use some of the editing and annotation features, watch our ‘how-to’ video tutorials.
Any other questions?
Check out our FAQs or let our friendly and knowledgeable staff help you.
Ready to get started?
Try a fully-featured version of FlashBack Pro today. For free.
Flashback Pro has officially made way for Flashback Express, with a fresh design, faster workflows, and all-new features built on what made Pro great!
If you’re a current Flashback Pro user, don’t worry, we’ll continue to offer support and extra licenses if you need them. Also, you can import old Pro recordings into Express 7 projects, so nothing gets left behind.
Need to upgrade? Flashback Express is ready when you are!